Gantt Chart
The Gantt Chart widget is a powerful tool designed to enhance project management by providing a visual timeline of tasks and their progress. This guide will walk you through adding the Gantt Chart widget to your dashboard, configuring its settings and utilizing its features.
Using the Gantt Chart
To incorporate the Gantt Chart widget into your dashboard:
-
Navigate to the desired dashboard.
-
Click on the Add Widget button in the dashboard settings.
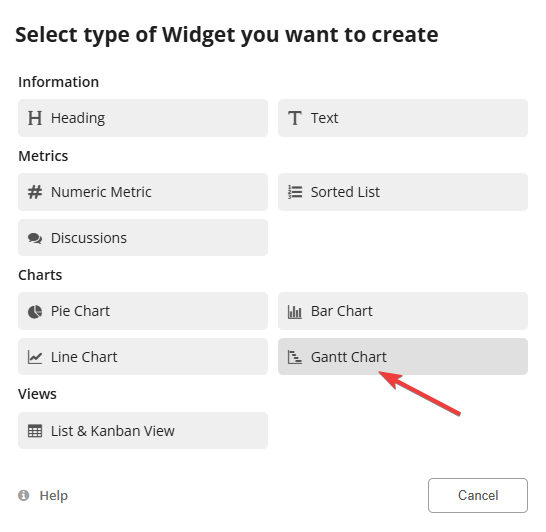
-
Select Gantt Chart from the list of available widgets.
-
Choose the relevant App (e.g., Tasks, Projects) that contains the records you want to display.
-
Click Done to finalize.
Gantt chart settings
Note: The following examples use the Projects and Tasks Apps. See use case.
Display
| Select App |
The App whose records will be displayed in the Gantt chart.
|
| Title |
A field in the App which will be used to identify the records, for example a Task or Roadmap item title. |
| Extra Columns |
Display additional fields from your App, such as priority or assigned team members. |
| Start Date (Required) |
Specify the field that represents the tasks's start date. This is mandatory for the Gantt chart to function correctly. |
| End Date (Optional) |
If your tasks have defined end dates, select the corresponding field. If left blank, tasks will be displayed as only a one day task. |
| Progress (Optional) |
Choose a field that indicates the completion percentage of tasks. This allows the Gantt chart to visually represent task progress within the bars. |
| Successive records (Optional) |
Define dependencies between tasks by selecting a field that links to successive records. This feature helps in visualizing task sequences and dependencies. |
| User Field (Optional) |
Select this option if you want to show the user managing or assinged to a task in the Gantt Chart. |
| Group By (Optional) |
Organize tasks by categories such as status or project phase by selecting a grouping field. This aids in structuring the Gantt Chart for better clarity. |
Gantt Chart Formatting
Formatting lets you add additional styling options to the widget.
| Color formatting (optional) |
Automatically color-code bars in the Gantt Chart based on a selected field, such as Stage or Status. The color formatting used on that field will be applied to the bars, helping in quickly identifying task in different stages. 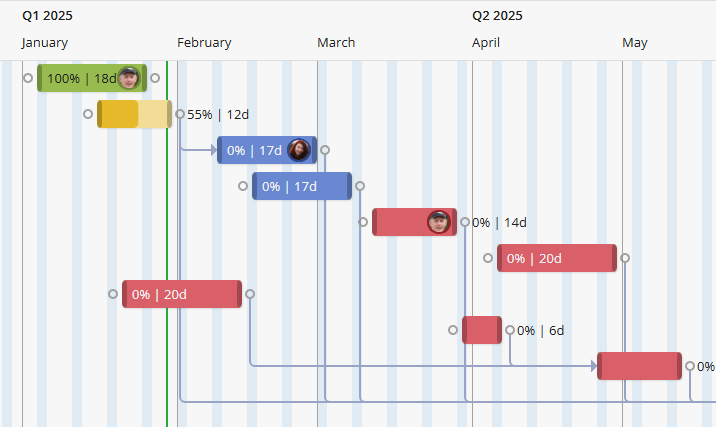
|
| Workdays and Work Hours |
Define the standard workdays and set the start and end times of a workday. This ensures the Gantt Chart accurately reflects your team's working schedule.
|
Using the Gantt Chart
A Gantt Chart is an incredibly useful tool, helping in several ways. Here are some of the actions and benefits you can leverage while using a Gantt Chart:
Timeline and Zooming
A Gantt Chart's timeline displays tasks as horizontal bars, with their lengths representing task durations.
The zooming options in Gantt charts allow you to adjust the time scale, providing flexibility in how project data is viewed.
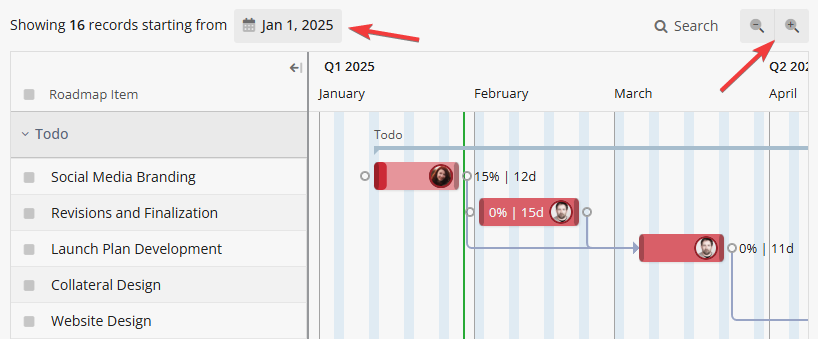
You can also select the date from which tasks are displayed to focus on a specific period.
By effectively utilizing the timeline and zooming features, complex schedules can be navigated with ease, ensuring that both immediate tasks and long-term objectives are clearly visualized and managed.
Quickly updating a schedule
By selecting and dragging a task bar, you can modify its start and end dates seamlessly. This intuitive method streamlines the process of rescheduling tasks as project timelines evolve.
To fine-tune task durations, users can drag the edges of a task bar to extend or shorten its length. This direct manipulation provides a quick way to adjust timelines in response to project changes.
Right-clicking on a bar will display all the standard record options, enabling you to generate reports, trigger workflows, etc. Clicking on a bar will open the record popup for quick editing.
You can also change the user assigned or the status of a task by dragging a record from one group to another.
Create new records
If you have create access in the App, you can quickly create new records in the Gantt Chart by starting to write the title in the + Create new record. This action will allow you to name the record and choose a start and/or end date.
Optionally, you can also click on a blank area (any spot without an existing record) aand drag your mouse to set the start and end dates for a new record. You can then write the task title on the left to save it, or click on the bar to open the full record popup and add more details.
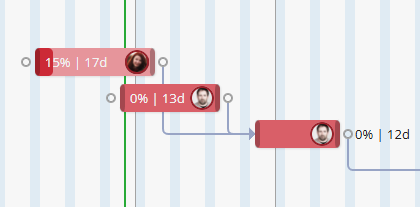
Dependency
In project planning, certain tasks need to be completed in a specific order. In the Gantt Chart, you can show these task dependencies using arrows that connect the task bars.
To set this up, use the Successive Records option. This requires a relationship field that links back to the same App, not to a different one. The arrow indicates the direction of the dependency, pointing from the earlier task to the later one.
You can create these connections directly within the Gantt Chart.
Note: When using grouping in the Gantt Chart, dependencies are not currently shown across groups.
Gantt video tutorial
Finally, check out this video tutorial on adding a Gantt chart to your dashboard and customizing it to perfectly fit your needs!
Gantt Chart Filtering
You can apply two types of data filtering: widget filtering and saved views.
Widget filtering should be applied as a base filter.
For example, you might want a Gantt Chart widget to display only Tasks related to a specific Project.
Note: Widget filtering will be applied to all users.
Saved views can then be applied on the whole dashboard (unlike widget filters, that are applied per widget) and you can, for example, show only Tasks with a specific status.
Note: Saved views are applied on top of widget filters. Unlike widget filtering, saved views are only applied to the user in context. You can share them with other team members.